Integrating with Terraform Cloud and Enterprise
Introduction
This guide explains how to integrate Gruntwork's Infrastructure as Code (IaC) Library with HashiCorp's Terraform Cloud (TFC) and Terraform Enterprise (TFE). While Terraform Open Source is robust and flexible, many organizations use TFC/TFE for CLI/UI integration, approval workflows, Sentinel policies, and auditing. Terraform Enterprise is a self-hosted version of Terraform Cloud. For simplicity, this guide will refer to both as "TFC."
In our guide on Customizing Modules, we explained the use of two repositories:
infrastructure-modules: Contains Terraform or OpenTofu code wrapping Gruntwork's IaC Library modules.infrastructure-live: Contains Terragrunt configurations for managing Terraform across accounts and environments.
Use TFC without Terragrunt
In this approach:
- Modules reside in the
infrastructure-modulesrepository. - Each module corresponds to a dedicated TFC workspace.
- Terraform runs are triggered via the TFC UI or CLI.
- TFC essentially replaces Terragrunt and the
infrastructure-liverepository.
While this method provides access to TFC's feature set, it does not leverage Terragrunt's capabilities to reduce redundancy (DRY), manage CLI arguments, or apply changes across multiple modules/environments
Use TFC with Terragrunt
In this approach:
- Wrapper modules remain in the
infrastructure-modulesrepository. - Terragrunt configurations in
infrastructure-livemanage deployments. - TFC is used as a remote backend for Terraform.
- Terraform runs are triggered via the Terragrunt CLI, while TFC tracks and audits execution.
This method combines TFC's audit and state management with Terragrunt's workflow optimizations.
One time set up
If using TFE, first refer to HashiCorp's installation guide. Adjust any references to app.terraform.io to point to your TFE host.
Create an account
The first step is to establish an account at Terraform Cloud.
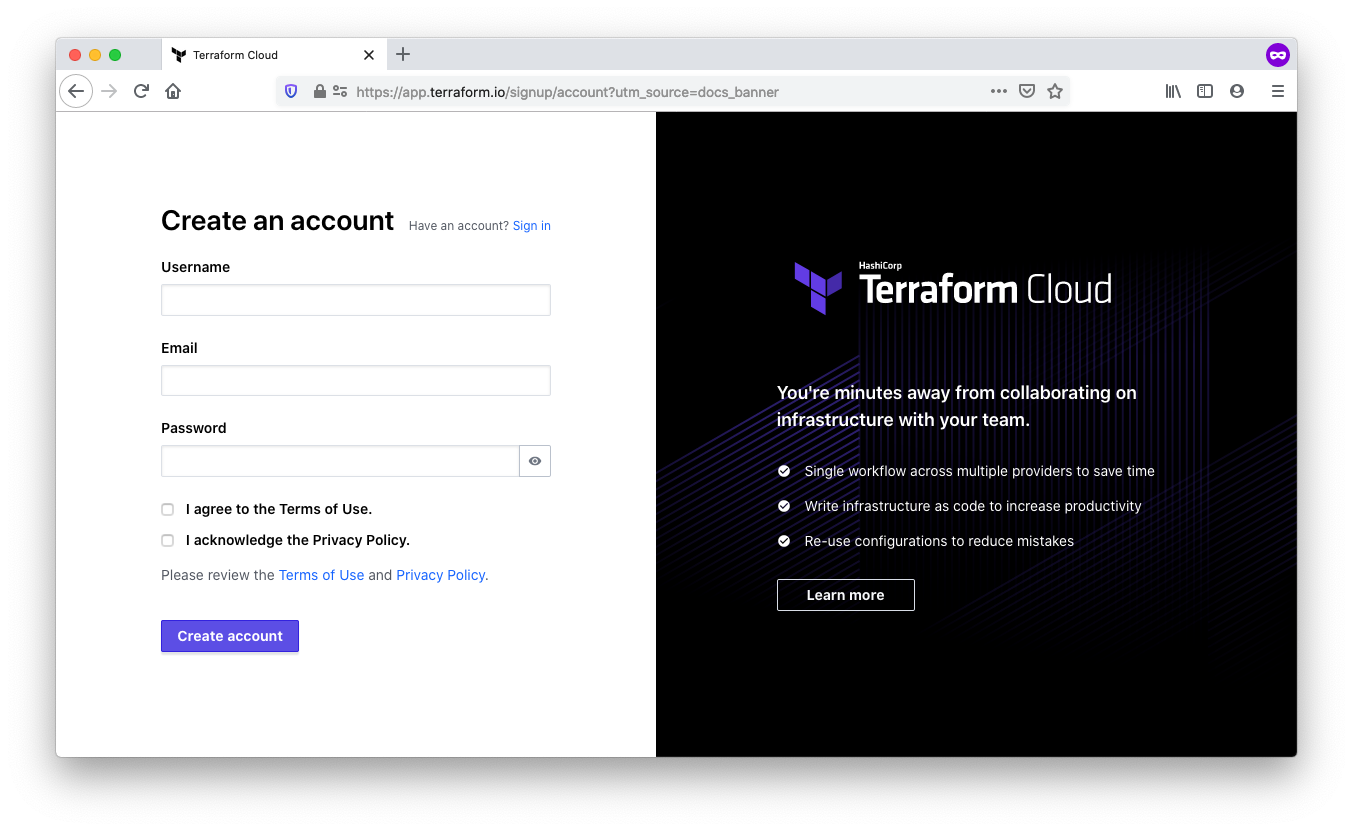 Sign up for a Terraform Cloud account
Create an organization
After verifying your email, create a new organization. Use lowercase letters and avoid whitespace, optionally using - or _ for readability.
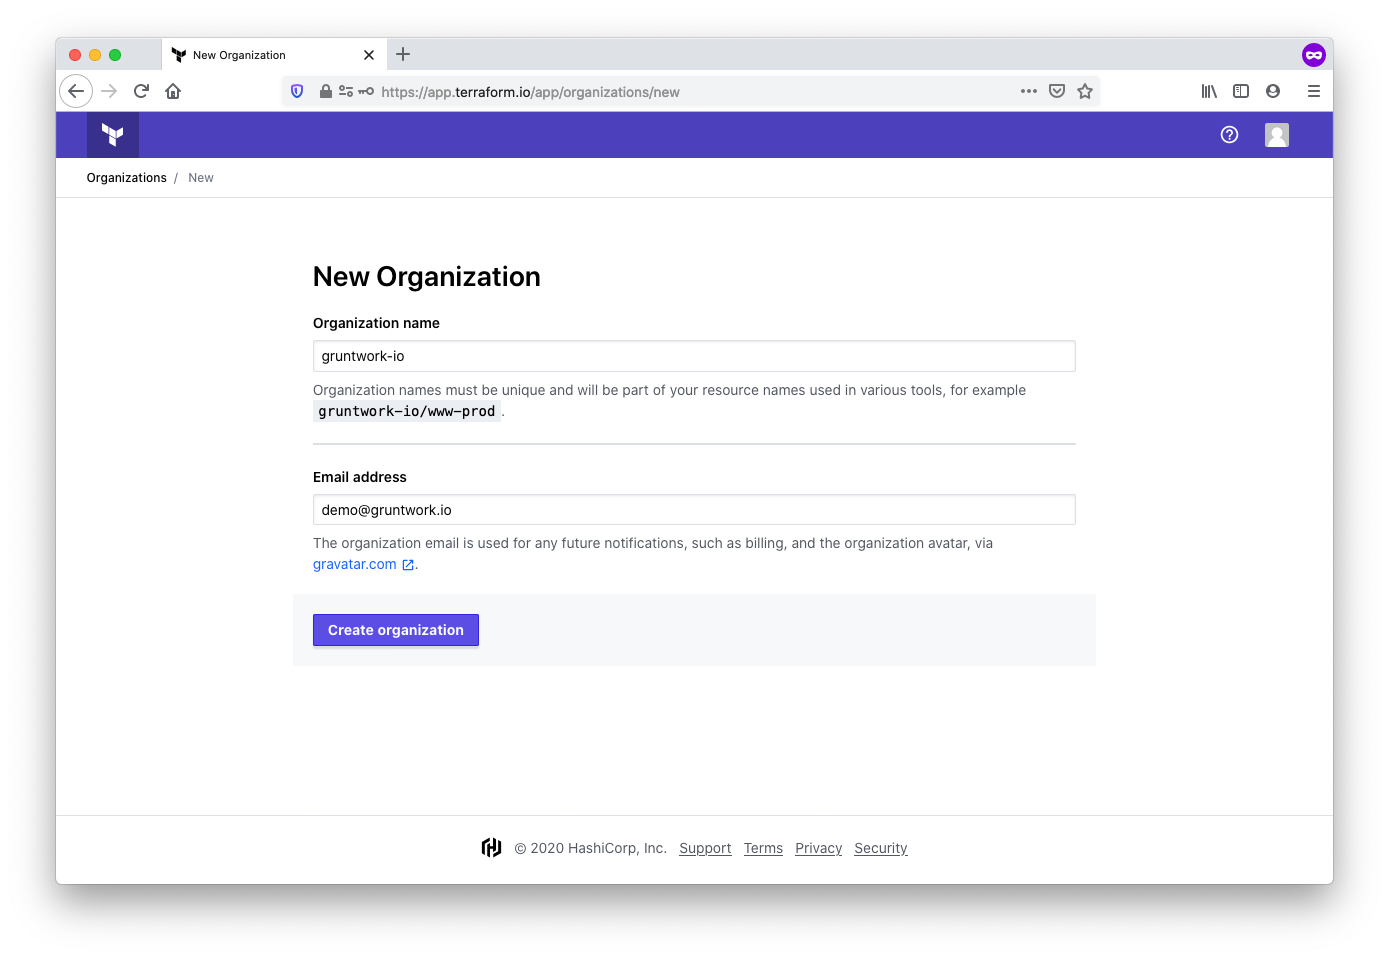 Create an organization in TFC
Set up an SSH key
When using Gruntwork modules, the source attribute in a module block retrieves modules from a Gruntwork code repository. For instance, to create an SQS queue using the SQS module from package-messaging, you might define the following module block:
provider "aws" {
 region = "us-east-1"
}

module "sns" {
  source = "git::git@github.com:gruntwork-io/package-messaging.git//modules/sqs?ref=v0.3.2"
  name   = "my-queue"
}
The git::git@github.com:gruntwork-io portion of the source attribute indicates that this module is accessed over SSH. As a result, TFC will need access to the Gruntwork code repositories via SSH.
To configure this access, follow these steps:
-
If you do not already have one, create a machine user with access to Gruntwork. A machine user is an account used solely for automation purposes, not for individual users. In this case, the "machine" refers to the TFC executor. Create a new GitHub user account and provide the machine user’s username and email address to support@gruntwork.io. We will grant the required access to our repositories.
-
Generate an SSH key pair and attach the public key to the GitHub machine user account. For step-by-step guidance, refer to GitHub's SSH setup documentation.
-
Add the private SSH key to TFC under the SSH Keys section in the TFC organization settings. For clarity, label the key appropriately, such as Gruntwork access. TFC will use this key to clone Gruntwork repositories.
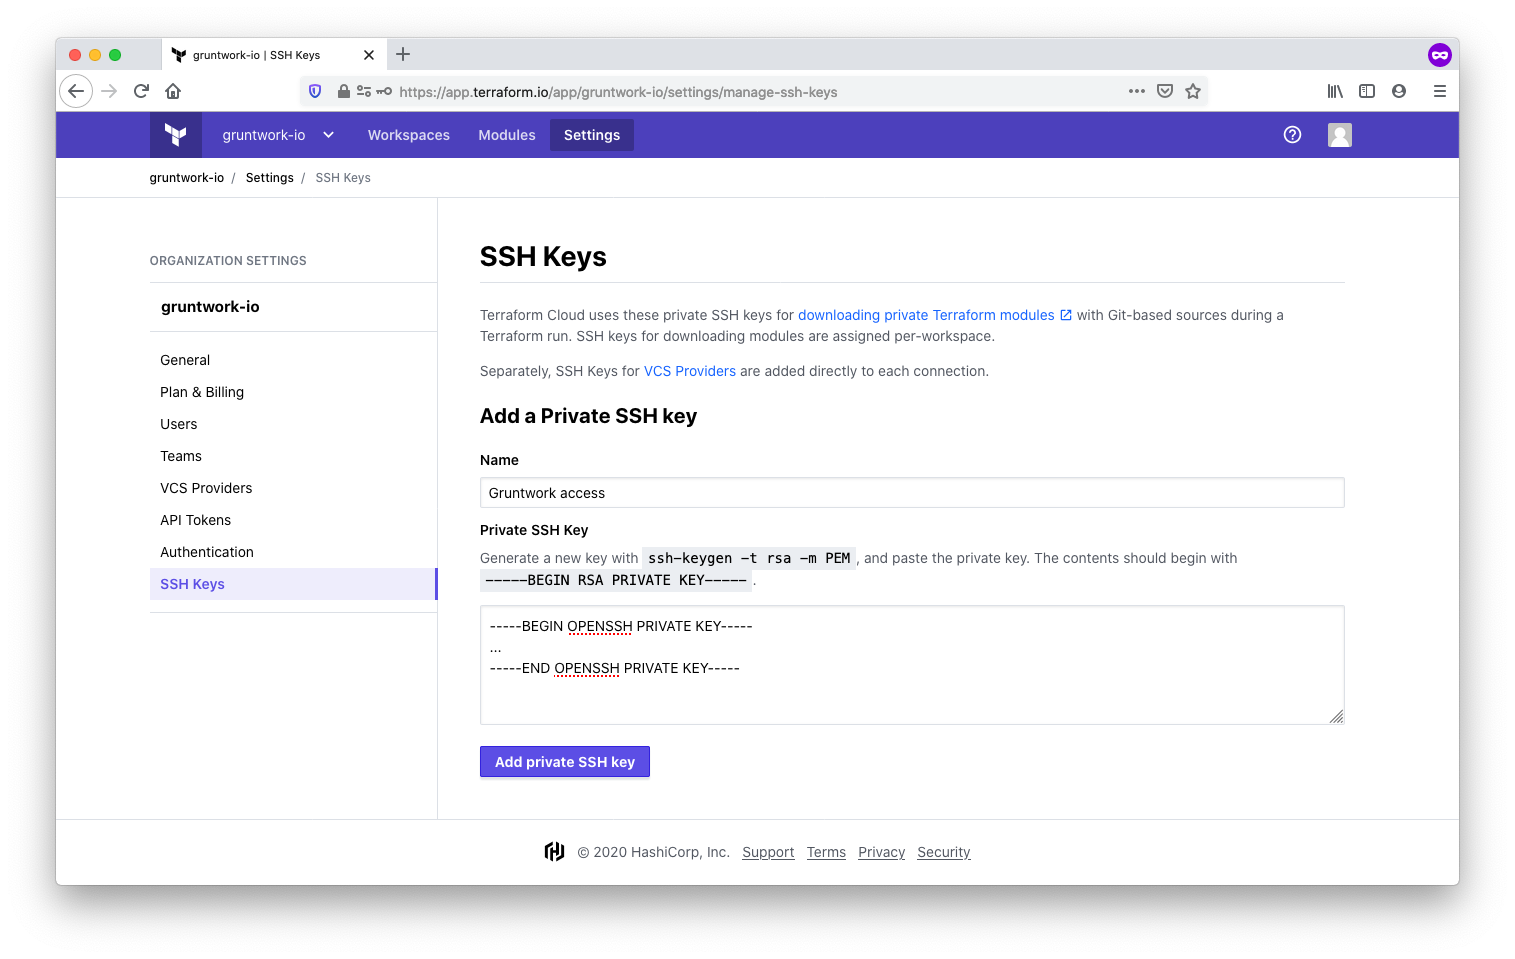 Configuring an SSH key for the TFC organization
Once the SSH key is configured, the one-time setup is complete.
Using TFC without Terragrunt
This section explains using TFC to deploy infrastructure by leveraging Gruntwork’s Terraform modules. Use this method to execute Terraform operations from your local CLI or directly through the TFC UI.
Workspaces in TFC store the state associated with Terraform-managed infrastructure. The state is stored in TFC. Connect outputs from one workspace as inputs to another using the remote_state data source. This method allows you to link multiple workspaces to build a complete, end-to-end infrastructure.
In the using Gruntwork modules guide, we introduce the wrapper module pattern, where multiple Terraform modules are organized in a directory hierarchy under infrastructure-catalog/modules. Following this pattern, each TFC workspace references the same infrastructure-catalog repository but points to specific subdirectories corresponding to different modules.
Gruntwork modules must be hosted in your own repository by wrapping or copying them to enable their use with the Terraform registry. We require this approach because TFC creates a webhook in the repository, which requires admin-level access. Since we cannot grant admin access to Gruntwork repositories, customers must host the modules in their own repositories.
Enterprise customers can use our repo-copier tool to simplify module management. The tool creates a complete, self-hosted clone of the Gruntwork IaC library in your version control system, eliminating the need to manually wrap modules.
Follow these steps to set up a workspace for a simple SQS module. Start by creating a new workspace and linking it to your version control system (VCS) provider.
Connect to a version control provider
Connect the workspace to your preferred version control system, such as GitHub, GitLab, or Bitbucket, as it allows TFC to access your infrastructure-catalog repository. Once you integrate with a VCS, select the infrastructure-catalog repository from the list of available repositories.
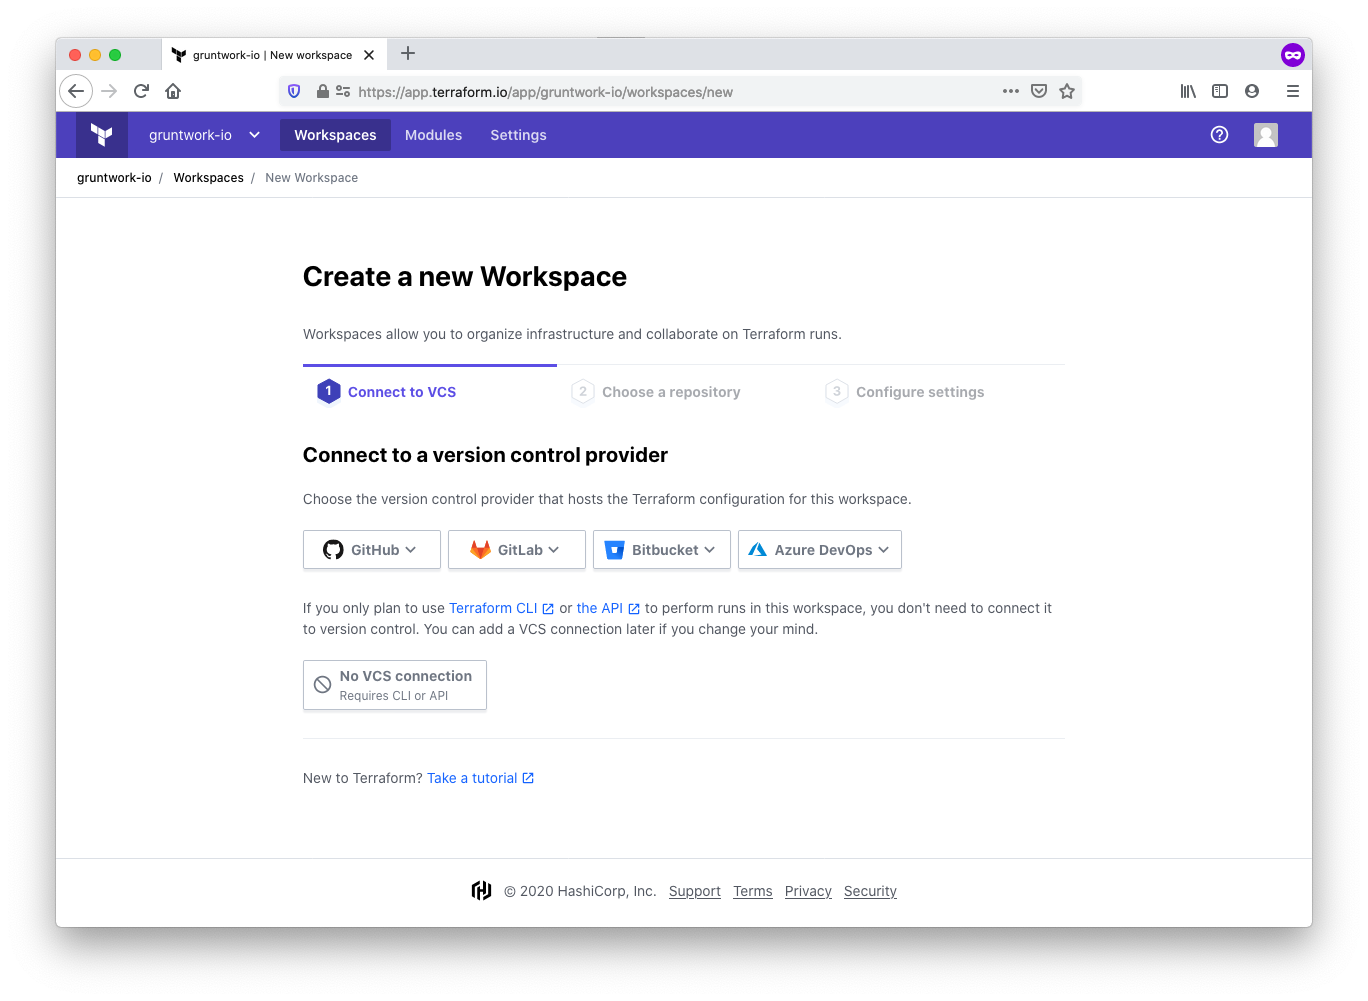 Connect a workspace to a VCS
Configure the workspace settings
Next, assign a name to the workspace and configure additional settings. Adhere to Terraform’s workspace naming guidelines to ensure a consistent and scalable naming convention. In this example, the workspace name is sqs-example-dev-us-east-1.
Additionally, specify the location of the module within your repository. Under the Advanced options section, locate the Terraform Working Directory field and input the path to the module. TFC will apply this same value to Automatic Run Triggering, ensuring that Terraform runs are only triggered when changes occur in the module directory. The path is /modules/networking/sqs for this example.
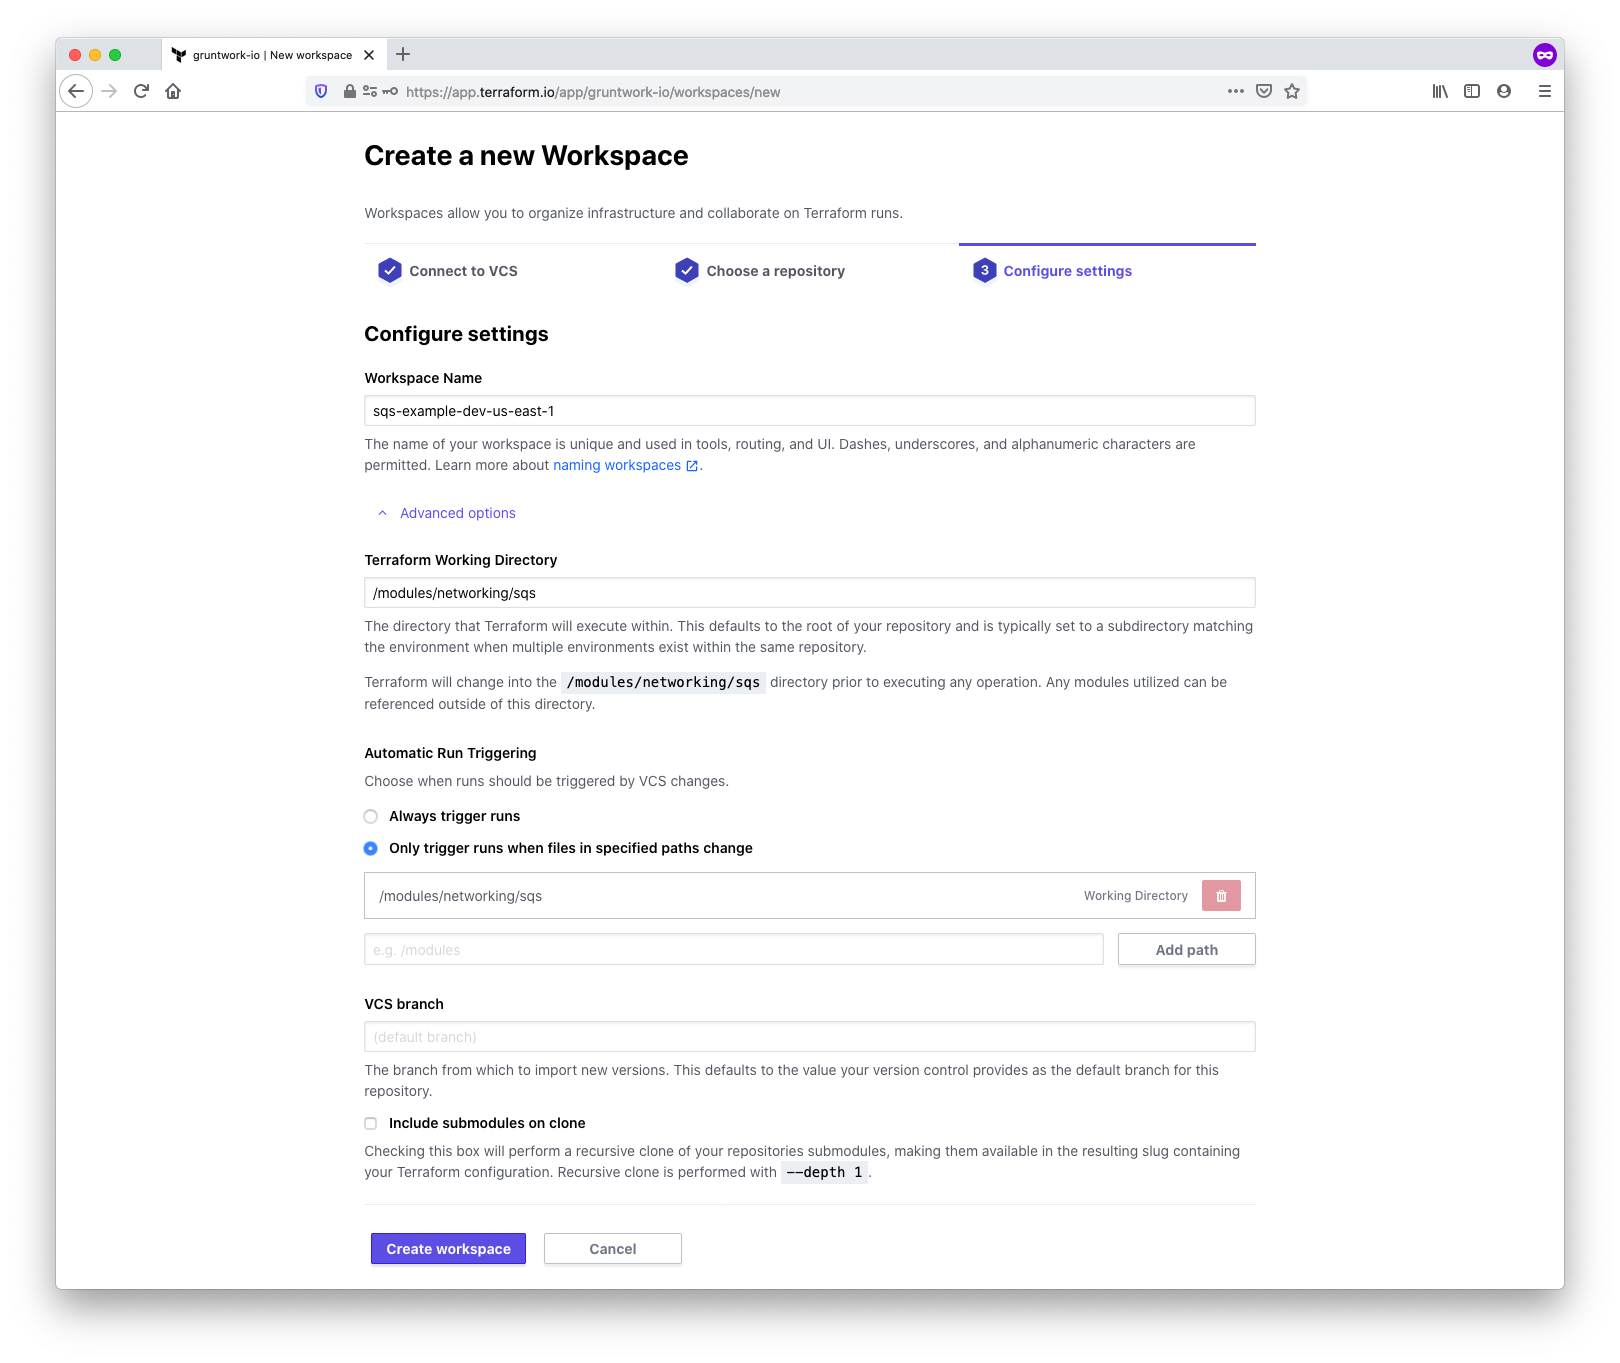 Configure workspace settings
Use the SSH key
As part of the one-time setup process described earlier, you configured an SSH key to access Gruntwork modules. In the workspace settings, select the SSH key you previously added.
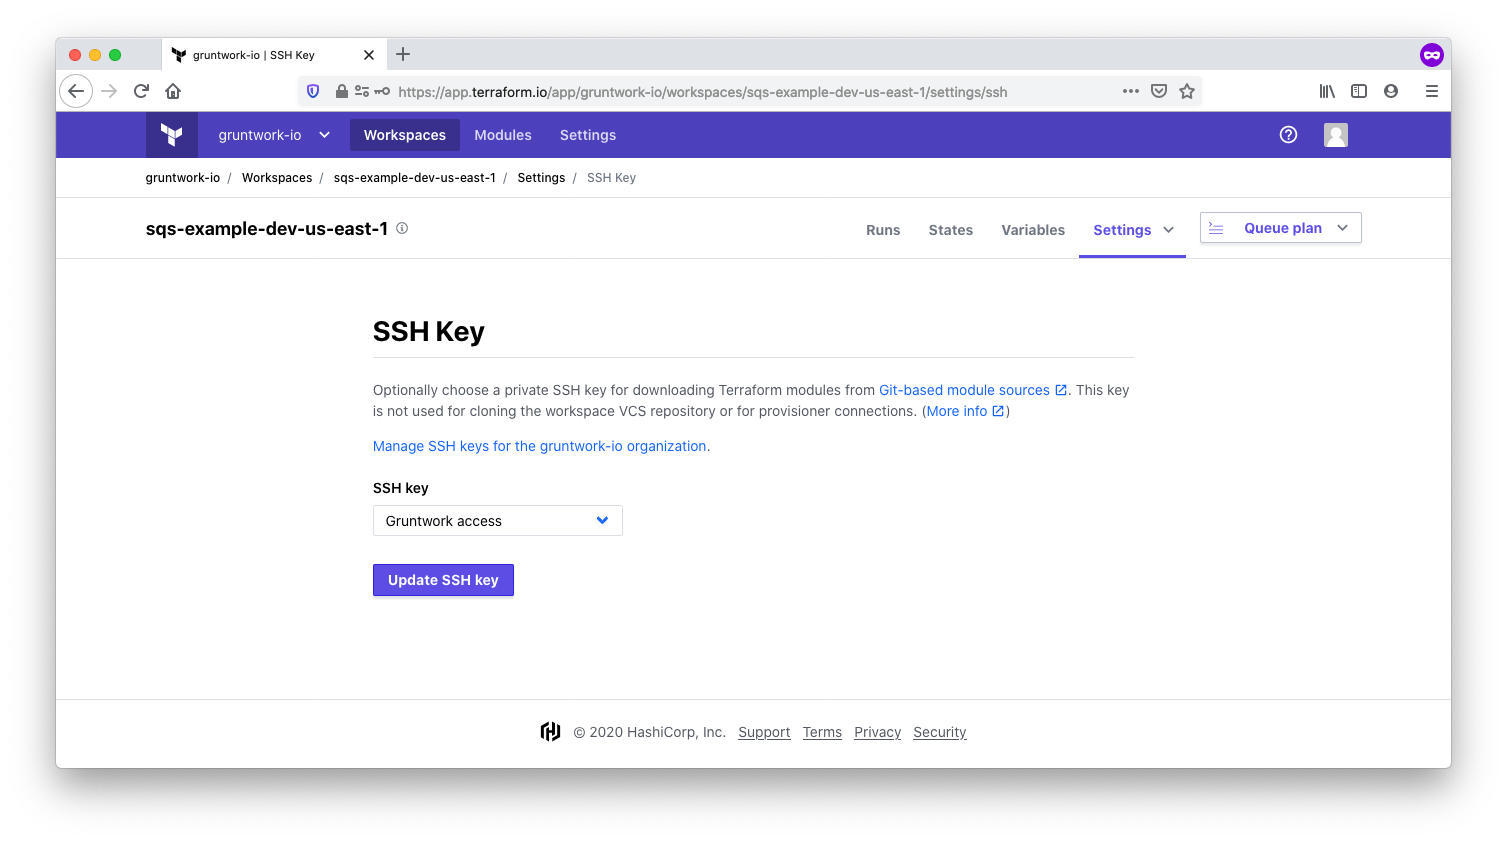 Choose the private SSH key
Configure credentials and variables
To enable the Terraform AWS provider used by the SQS module to interact with the AWS API, configure the standard AWS_ACCESS_KEY_ID and AWS_SECRET_ACCESS_KEY environment variables in the workspace. Mark the Sensitive checkbox to ensure these values remain secure and write-only.
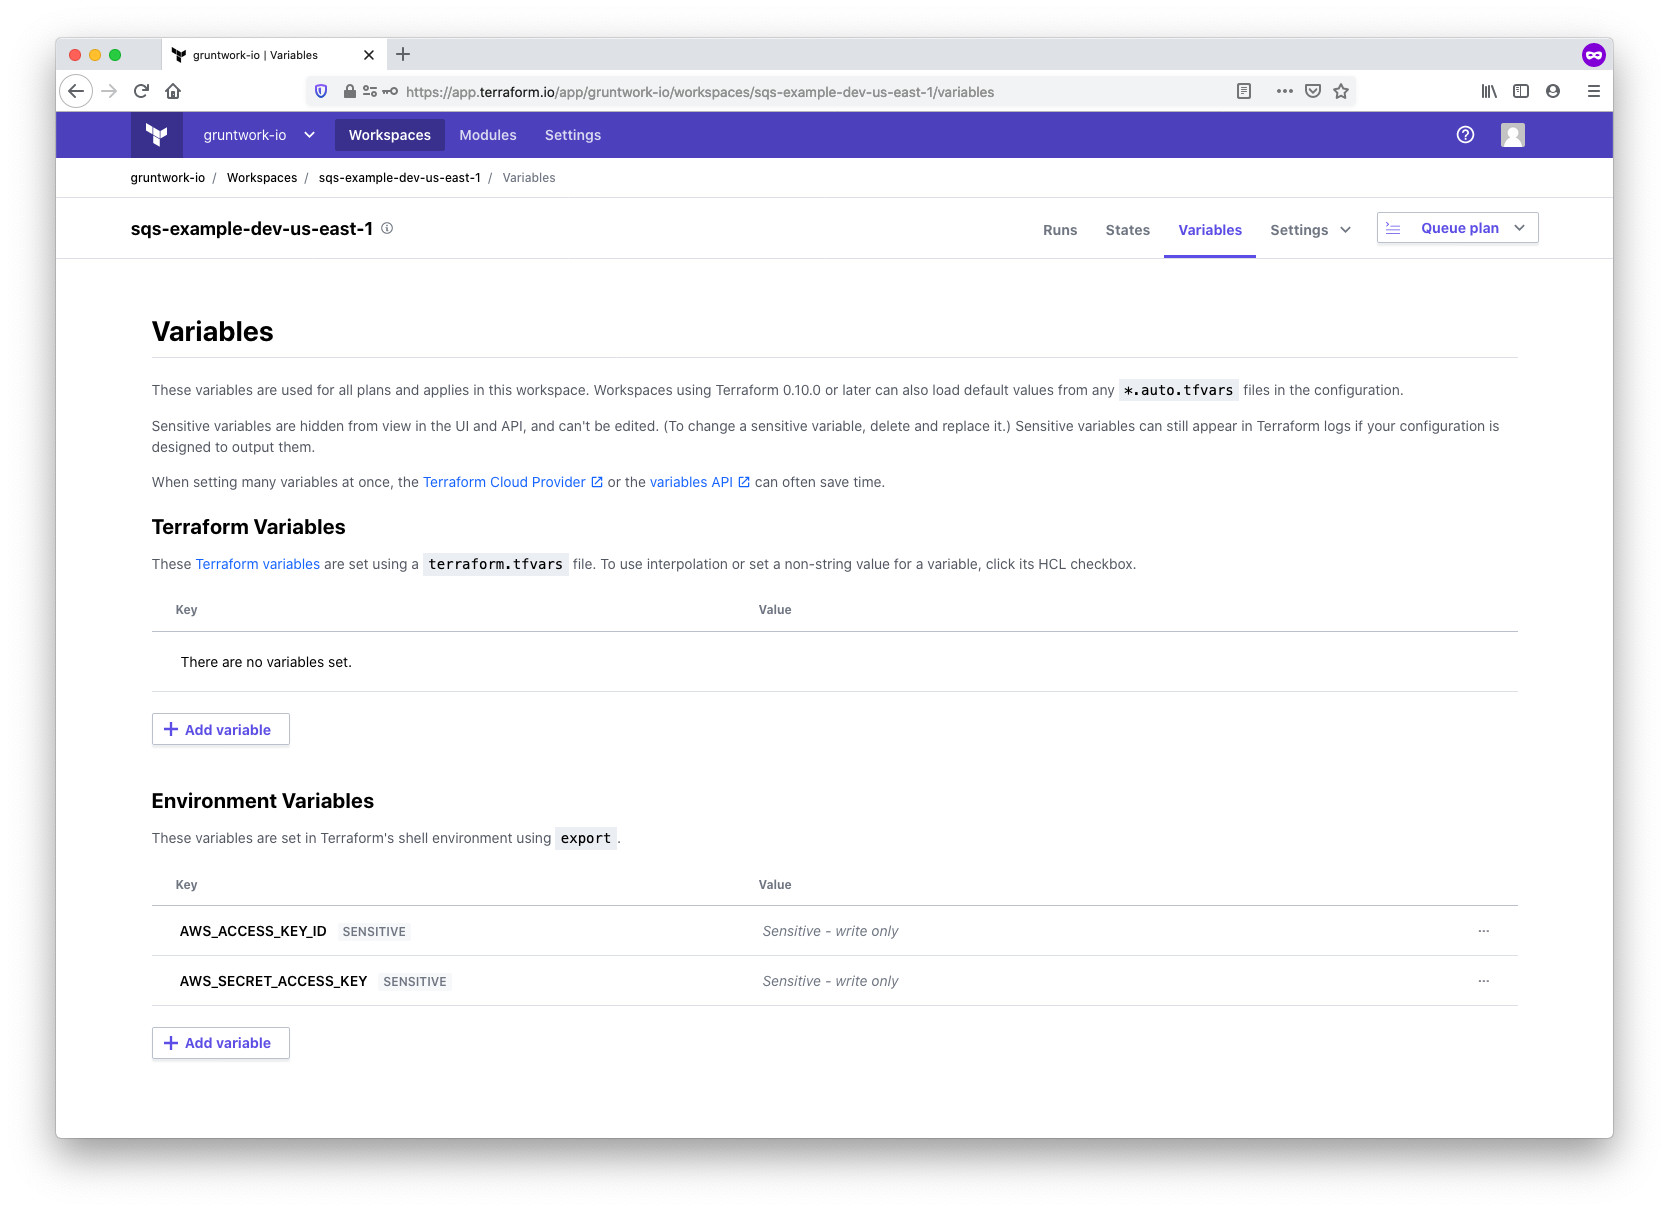 Configure AWS API credentials as environment variables in the workspace
Additionally, you can define values for any Terraform variables the module requires. In this example, the SQS module requires no input variables.
Queue and apply the configuration
With all configurations complete, you can initiate the plan and apply process. You have two options to trigger the run:
- Make a commit to a file within the working directory specified during workspace setup (e.g.,
/modules/networking/sqs). - Manually trigger the run using the Queue plan button in the Terraform Cloud (TFC) UI.
When the run begins, the following sequence will occur:
- Clone your
infrastructure-catalogrepository using the configured VCS connection. - Download the AWS provider and set credentials using the environment variables.
- Access the Gruntwork SQS module via SSH using the provided SSH key.
- Execute a
terraform planto generate an execution plan. - Pause for confirmation in the UI or CLI.
- Upon confirmation, execute a
terraform applyto provision the resources.
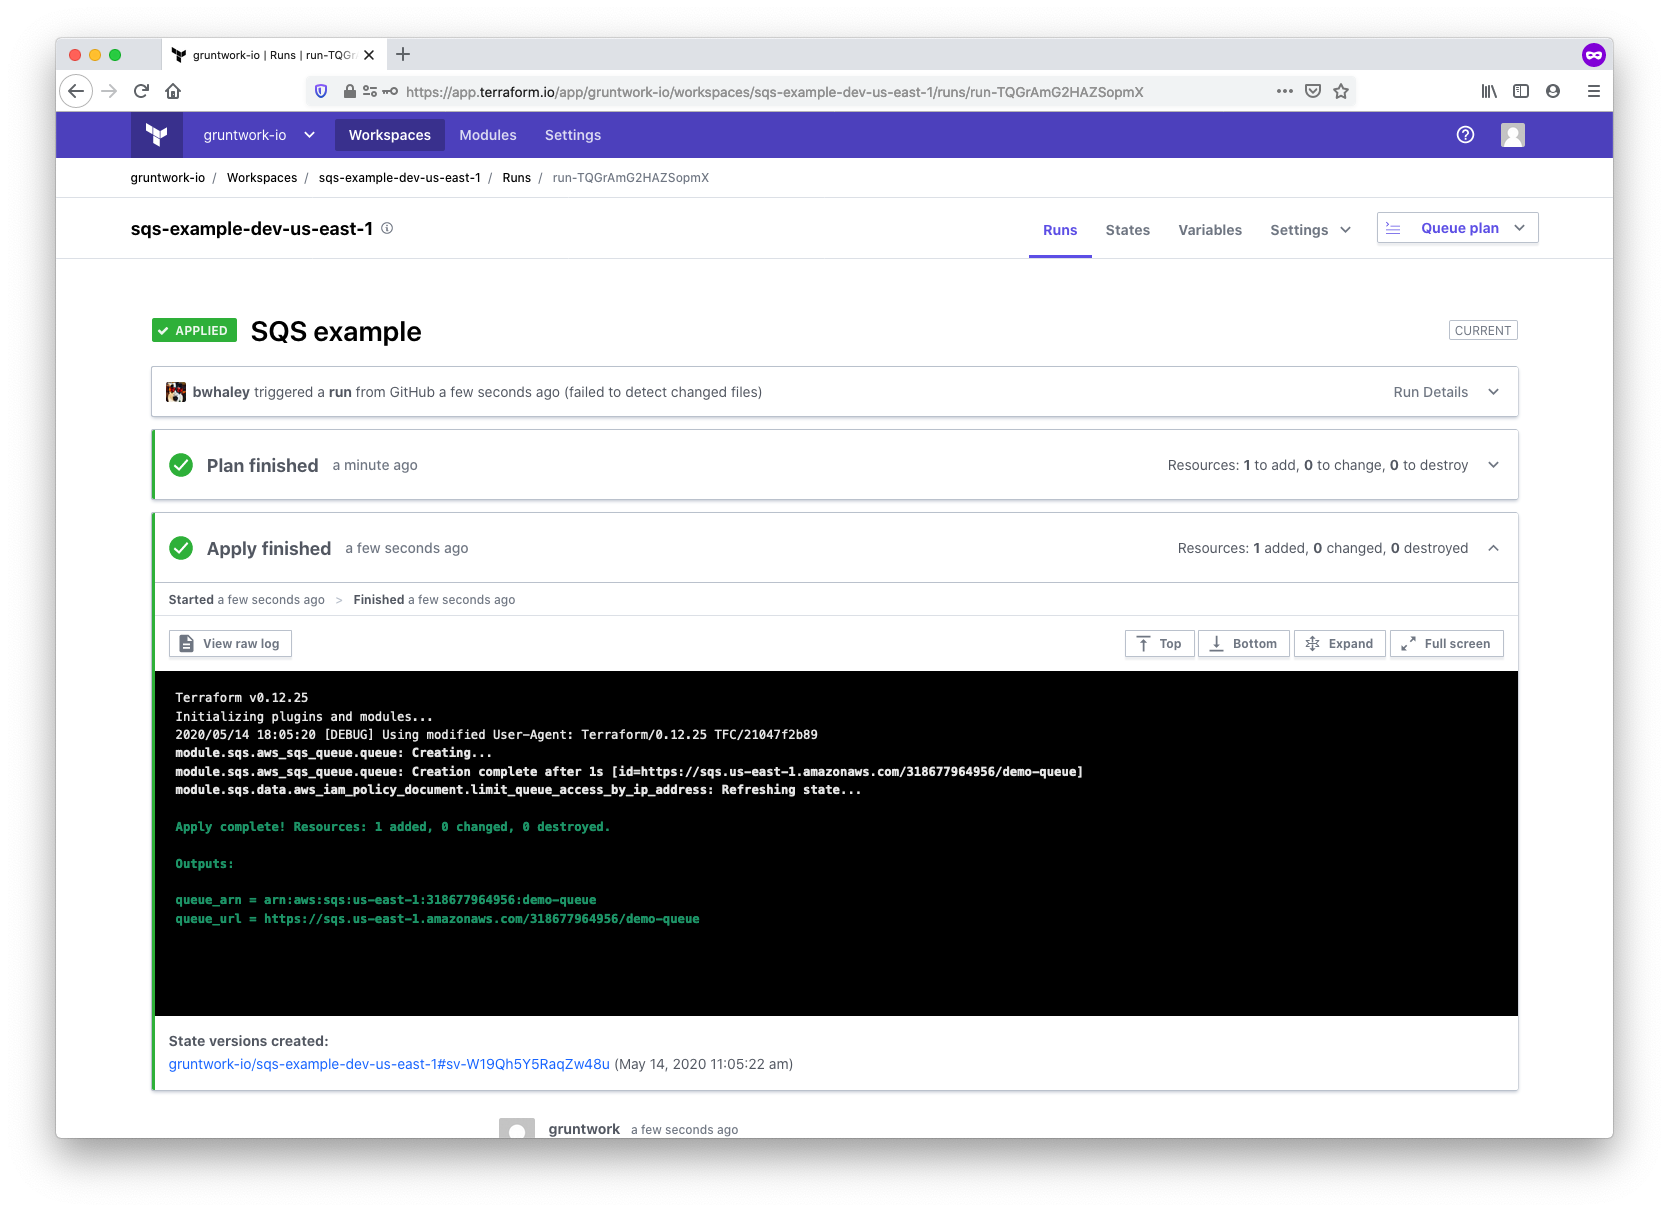 TFC run results
Final thoughts on integrating TFC with the Gruntwork IaC Library
Integrating Terraform Cloud (TFC) with the Gruntwork IaC Library is straightforward. All Terraform wrapper modules can be centrally managed within a single repository by leveraging the' infrastructure-modules' approach described in this guide. You can then configure a dedicated workspace for each module and connect them using the remote_state data source to build a comprehensive infrastructure.
This pattern works with any of Gruntwork’s Terraform modules, including complex modules like terraform-aws-eks. For modules requiring external dependencies—such as kubergrunt—Gruntwork employs the executable-dependency module to dynamically install the required tools within the TFC executor at runtime.
Gruntwork may offer modules through a private Terraform registry in the future, further simplifying workflows by eliminating the SSH key requirement.
Once you configure your workspace, you can trigger Terraform, which runs directly through the TFC UI or from the command line using the terraform CLI. To execute runs via the CLI, follow the CLI-driven Run Workflow instructions provided by HashiCorp.
Using TFC with Terragrunt
The Terraform Cloud (TFC) UI only runs Terraform commands, while Terragrunt operates as a wrapper around Terraform. This means the TFC UI cannot directly trigger Terragrunt. However, you can configure Terraform to execute remote operations, such as plan and apply, within TFC while using Terragrunt to organize your code and maintain DRY configurations. When set up correctly, running terragrunt apply locally (or from a CI server) will invoke terraform apply within TFC rather than executing Terraform locally.
Key considerations
- Workspaces are still required, as explained in the "Using TFC without Terragrunt" section. You can create workspaces dynamically or reuse them if they already exist, including any associated variables and environment configurations such as AWS credentials.
- While you cannot trigger runs directly from the TFC UI, the output of
applyoperations will be visible in the UI, along with the history of past runs.
Steps to set up Terragrunt with TFC
The steps involved to set all this up include:
- Obtain an API token to enable Terraform to interact with TFC.
- Generate a
backend.tffile to configure Terraform to use TFC as a remote backend. - Set up workspaces for each module managed by Terragrunt.
- Define input variables for your modules.
Setting up
For demonstration purposes, we will deploy an SQS queue using the SQS module from the Gruntwork package-messaging repository.
Below is an example directory structure for an infrastructure-live repository:
. ├── dev │ ├── account.hcl │ └── us-east-1 │ ├── region.hcl │ └── sqs │ └── terragrunt.hcl ├── common.hcl └── terragrunt.hcl
This structure contains:
- A single environment (
dev). - A single module (
sqs) deployed to theus-east-1AWS region. - Shared configuration files (
account.hcl,region.hcl, andcommon.hcl) that provide reusable values.
You can easily extend this foundational setup to support additional environments, regions, or modules.
Obtain an API token
Terraform requires an API token to communicate with Terraform Cloud (TFC) as a backend. To generate a token, navigate to the user settings in TFC and select the Tokens section. If you are running Terragrunt on a CI system, the token should be associated with a machine user account rather than an individual user account to ensure consistent access.
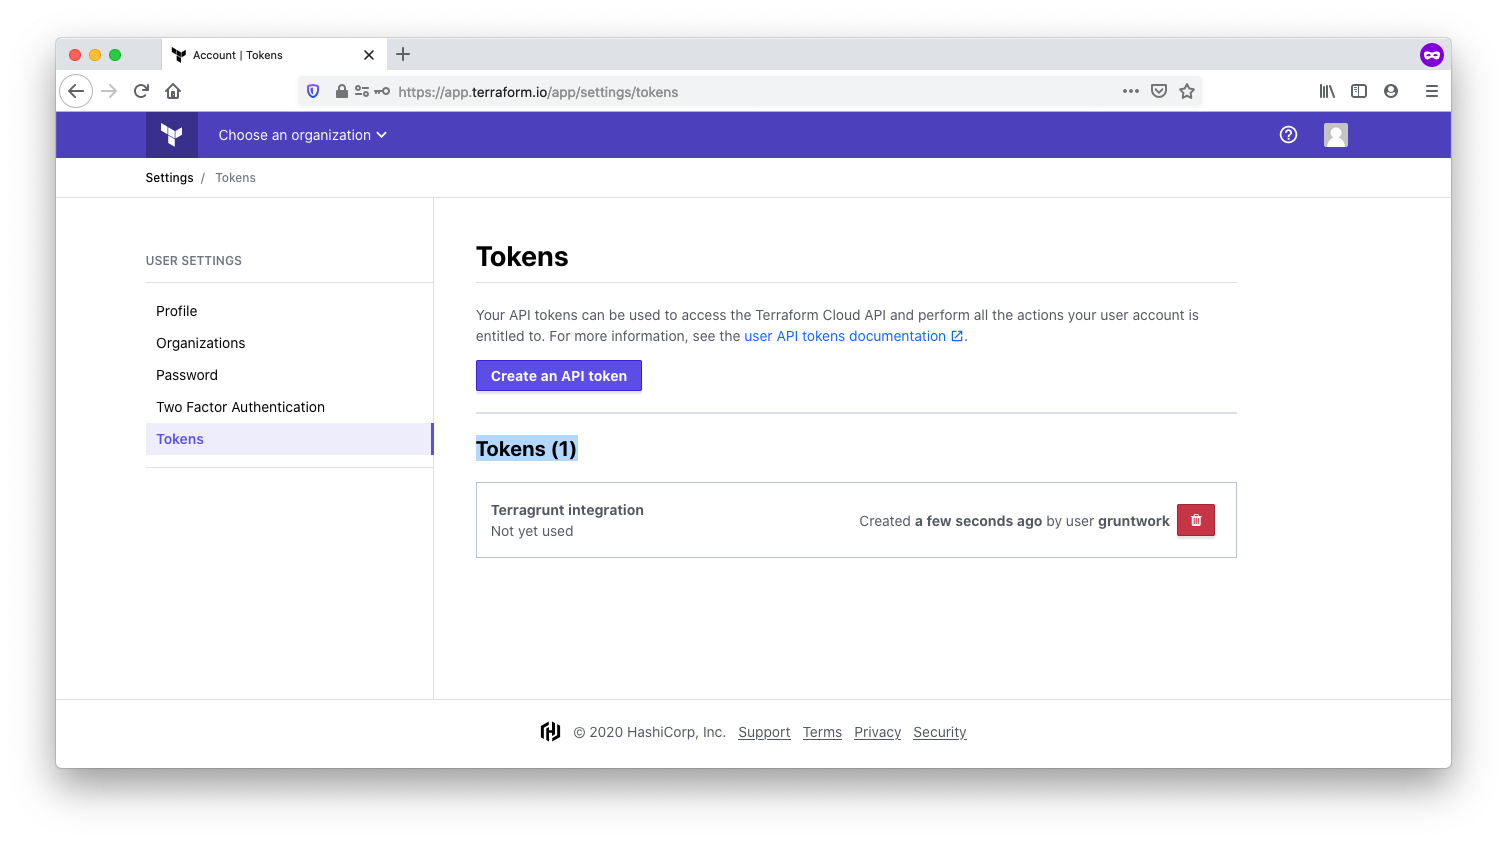 Creating a TFC API token
Once TFC generates a token, add it to your local Terraform configuration file (~/.terraformrc) within a credentials block. Doing so will enable Terraform to authenticate with TFC when running remote operations.
 For TFE, substitute the custom hostname for your TFE host
credentials "app.terraform.io" {
  token = "xxxxxxyyyyyyyyyzzzzzzzzzzzz"
}
Generating the backend
A backend block is required to configure Terragrunt to use Terraform Cloud (TFC) as a remote executor. The backend specifies where Terraform stores state and determines how to handle an execution. Using the Terragrunt generate block, you can dynamically create the backend configuration, eliminating the need to include it in each module.
Terraform workspaces manage state for a specific backend. In the Terragrunt configuration structure described earlier, each module (e.g., sqs) must use a unique workspace, and the workspace name is specified in the backend block. You must identify all necessary components of the naming convention to define these workspaces.
Following HashiCorp's recommendations, consider the following naming elements:
- Component name (e.g., sqs)
- Environment name (e.g., dev)
- Region (e.g., us-east-1)
The code snippet below demonstrates how to assemble these naming elements and generate the backend configuration:
infrastructure-live/terragrunt.hcl
locals {
  tfc_hostname     = "app.terraform.io" # For TFE, substitute the custom hostname for your TFE host
  tfc_organization = "gruntwork-io"
  workspace        = reverse(split("/", get_terragrunt_dir()))[0] # This will find the name of the module, such as "sqs"
  account_vars     = read_terragrunt_config(find_in_parent_folders("account.hcl"))
  region_vars      = read_terragrunt_config(find_in_parent_folders("region.hcl"))
}

generate "remote_state" {
  path      = "backend.tf"
  if_exists = "overwrite_terragrunt"
  contents = <<EOF
terraform {
  backend "remote" {
    hostname = "${local.tfc_hostname}"
    organization = "${local.tfc_organization}"
    workspaces {
      name = "${local.workspace}-${local.account_vars.locals.account}-${local.region_vars.locals.region}"
    }
  }
}
EOF
}
This code highlights several key features of Terragrunt:
-
Dynamic Backend Configuration: The
generateblock creates a file namedbackend.tf, which is placed alongside the other*.tffiles for the module being processed by Terragrunt. This approach dynamically adds abackendconfiguration to the module without requiring manual intervention. -
Terragrunt Built-in Functions: Terragrunt includes a robust set of built-in functions like
find_in_parent_folders(),read_terragrunt_config(), andget_terragrunt_dir(). These functions allow you to extract values dynamically, simplifying backend configuration. -
Native Terraform Functions: Terragrunt seamlessly integrates with Terraform's native functions. In this example, the configuration uses
split()andreverse()to parse the directory structure and extract the leaf directory name (e.g.,sqs) for use as the workspace suffix. -
Reusability Across Modules: By defining this configuration at the root of the Terragrunt hierarchy, it can be reused across multiple modules, minimizing code duplication. This structure enhances maintainability and scalability.
-
Contextual Execution: The
get_terragrunt_dir()function dynamically retrieves the current Terragrunt directory. For instance, if you executeterragrunt applyfrom thesqsmodule, the function resolves to the fully qualified filesystem path of thesqssubdirectory. Although the function is defined in the rootterragrunt.hcl, it adapts to the context in whichterragruntis invoked, ensuring flexibility and accuracy.
Creating a workspace and setting provider credentials
Terraform Cloud (TFC) will automatically create the workspace during terraform init when configuring a remote backend for a workspace that doesn't yet exist. This process is called implicit workspace creation. After TFC creates this workspace, your Terraform code will require API credentials to interact with the cloud provider.
You have the following options for setting up these credentials:
-
Manual Workspace Creation and Credential Configuration: Create all required workspaces manually in advance. Then, set the
AWS_ACCESS_KEY_IDandAWS_SECRET_ACCESS_KEYenvironment variables for each workspace. Detailed steps are in Configure credentials and variables. -
Manual Workspace Creation via Terragrunt: Manually create the workspaces by running
terragrunt init. Afterward, the environment variables are set up as described above. -
Programmatic Workspace and Credential Setup: Use the
tfe_workspaceandtfe_variableresources to programmatically configure the workspaces and set their credentials using Terraform itself. We highly recommended this approach for automation and consistency.
Regardless of which method you choose, keeping your workspaces aligned with your Terragrunt configuration is critical. For every new module added to Terragrunt, you need to create a corresponding workspace. If you rotate your AWS API keys, ensure they are updated in each workspace. A programmatic approach is recommended, as it reduces manual effort and lowers the risk of configuration drift.
Setting variables
In standard Terragrunt usage, variables are passed to Terraform through the inputs attribute. Variables defined in inputs are typically passed to Terraform using the environment variable mechanism. However, Terraform Cloud (TFC) does not support this approach. Instead, you can create a *.auto.tfvars file to provide the required inputs.
The terragrunt.auto.tfvars file generated during this process will reside on local disk. Depending on your setup, this file might contain sensitive information. To protect such data, ensure the file is not committed to version control. Add *.auto.tfvars to your .gitignore file to prevent accidental commits.
The following code shows how to generate a terragrunt.auto.tfvars file.
infrastructure-live/dev/us-east-1/sqs/terragrunt.hcl
terraform {
  source = "git::ssh://git@github.com/gruntwork-io/package-messaging//modules/sqs?ref=v0.3.2"
}

include {
  path = find_in_parent_folders()
}

locals {
  common_vars = read_terragrunt_config(find_in_parent_folders("common.hcl"))
}

generate "tfvars" {
  path      = "terragrunt.auto.tfvars"
  if_exists = "overwrite"
  disable_signature = true
  contents = <<-EOF
name = "${local.common_vars.locals.name}"
EOF
}
The configuration is composed of several key sections:
-
The
terraformblock at the top references the Gruntworksqsmodule from thepackage-messagingrepository. -
The
includeblock integrates the configuration from parent directories, including the remotebackendblock defined in the rootterragrunt.hclfile. -
The
localsblock retrieves values from thecommon.hclfile located at the root of the hierarchy, making those values accessible for local reference within the configuration. -
Lastly, the
generateblock creates aterragrunt.auto.tfvarsfile. This file, like the dynamically generatedbackend.tffile, is placed alongside the other*.tffiles fetched by Terragrunt from thesqsmodule. It ensures that the necessary inputs are available for Terraform Cloud (TFC) to read during the execution ofterraformcommands in the remote executor.
Including all required inputs for the module in the generated tfvars file is essential. In the example provided, only the name variable is included. Most modules, however, will require additional configuration inputs.
Running Terragrunt
Once all configurations are in place, you can run terragrunt init to initialize the workspace (if it does not already exist) and then terragrunt apply to deploy the infrastructure. Terragrunt acts as a wrapper, invoking Terraform to perform the plan and apply stages on Terraform Cloud (TFC). During this process, the workflow will pause for confirmation between stages. However, if you run terragrunt apply-all, Terragrunt adds the -auto-approve flag, bypassing interactive approval and skipping the confirmation step.
To begin, execute terragrunt init. This command generates the necessary backend configuration and tfvars file, establishing a connection to the remote backend. Below is an example output, with irrelevant details omitted for brevity.
$ terragrunt init
[terragrunt] 2020/05/15 14:36:54 Reading Terragrunt config file at <redacted>/infrastructure-live/dev/us-east-1/sqs/terragrunt.hcl
... [snip] ...
[terragrunt] 2020/05/15 14:36:55 Generated file <redacted>/infrastructure-live/dev/us-east-1/sqs/.terragrunt-cache/m6q2Wdn6A9TxoqahZZQpvrPqzAU/owCGC2BufzNDW7KyzOE-oDrwatg/modules/sqs/backend.tf.
[terragrunt] 2020/05/15 14:36:55 Generated file <redacted>/infrastructure-live/us-east-1/sqs/.terragrunt-cache/m6q2Wdn6A9TxoqahZZQpvrPqzAU/owCGC2BufzNDW7KyzOE-oDrwatg/modules/sqs/terragrunt.auto.tfvars.
[terragrunt] 2020/05/15 14:36:55 Running command: terraform init

Initializing the backend...
Backend configuration changed!

Terraform has detected that the configuration specified for the backend
has changed. Terraform will now check for existing state in the backends.

Successfully configured the backend "remote"! Terraform will automatically
use this backend unless the backend configuration changes.
Now, proceed with running terragrunt apply` to execute the changes. This command triggers Terragrunt to invoke Terraform, which will carry out the plan and apply stages within Terraform Cloud (TFC), ensuring infrastructure changes are applied as specified.
$ terragrunt apply
Running apply in the remote backend. Output will stream here. Pressing Ctrl-C
will cancel the remote apply if it's still pending. If the apply started it
will stop streaming the logs, but will not stop the apply running remotely.

Preparing the remote apply...

To view this run in a browser, visit:
https://app.terraform.io/app/gruntwork-io/sqs-dev-us-east-1/runs/run-esQKC9ATKPnDywN1

Waiting for the plan to start...

Terraform v0.12.24
Configuring remote state backend...
Initializing Terraform configuration...
2020/05/15 21:41:31 [DEBUG] Using modified User-Agent: Terraform/0.12.24 TFC/ba6190e398
Refreshing Terraform state in-memory prior to plan...
The refreshed state will be used to calculate this plan, but will not be
persisted to local or remote state storage.

!------------------------------------------------------------------------
Terraform will perform the following actions:

  # aws_sqs_queue.queue will be created
  + resource "aws_sqs_queue" "queue" {
      + arn                               = (known after apply)
      + content_based_deduplication       = false
      + delay_seconds                     = 0
      + fifo_queue                        = false
      + id                                = (known after apply)
      + kms_data_key_reuse_period_seconds = 300
      + max_message_size                  = 262144
      + message_retention_seconds         = 345600
      + name                              = "example-name"
      + policy                            = (known after apply)
      + receive_wait_time_seconds         = 0
      + visibility_timeout_seconds        = 30
    }

Plan: 1 to add, 0 to change, 0 to destroy.
Do you want to perform these actions in workspace "sqs-dev-us-east-1"?
  Terraform will perform the actions described above.
  Only 'yes' will be accepted to approve.

  Enter a value: <enter yes>

aws_sqs_queue.queue: Creating...
aws_sqs_queue.queue: Creation complete after 0s [id=https://sqs.us-east-1.amazonaws.com/0123456789012/example-name]
data.aws_iam_policy_document.limit_queue_access_by_ip_address: Refreshing state...

Apply complete! Resources: 1 added, 0 changed, 0 destroyed.

Outputs:

queue_arn = arn:aws:sqs:us-east-1:0123456789012:example-name
queue_name = example-name
queue_url = https://sqs.us-east-1.amazonaws.com/0123456789012/example-name
TFC runs a plan first, waits for confirmation, and then runs apply. The confirmation can be entered either on the command line or in the UI. Once complete, the results are visible in the TFC UI:
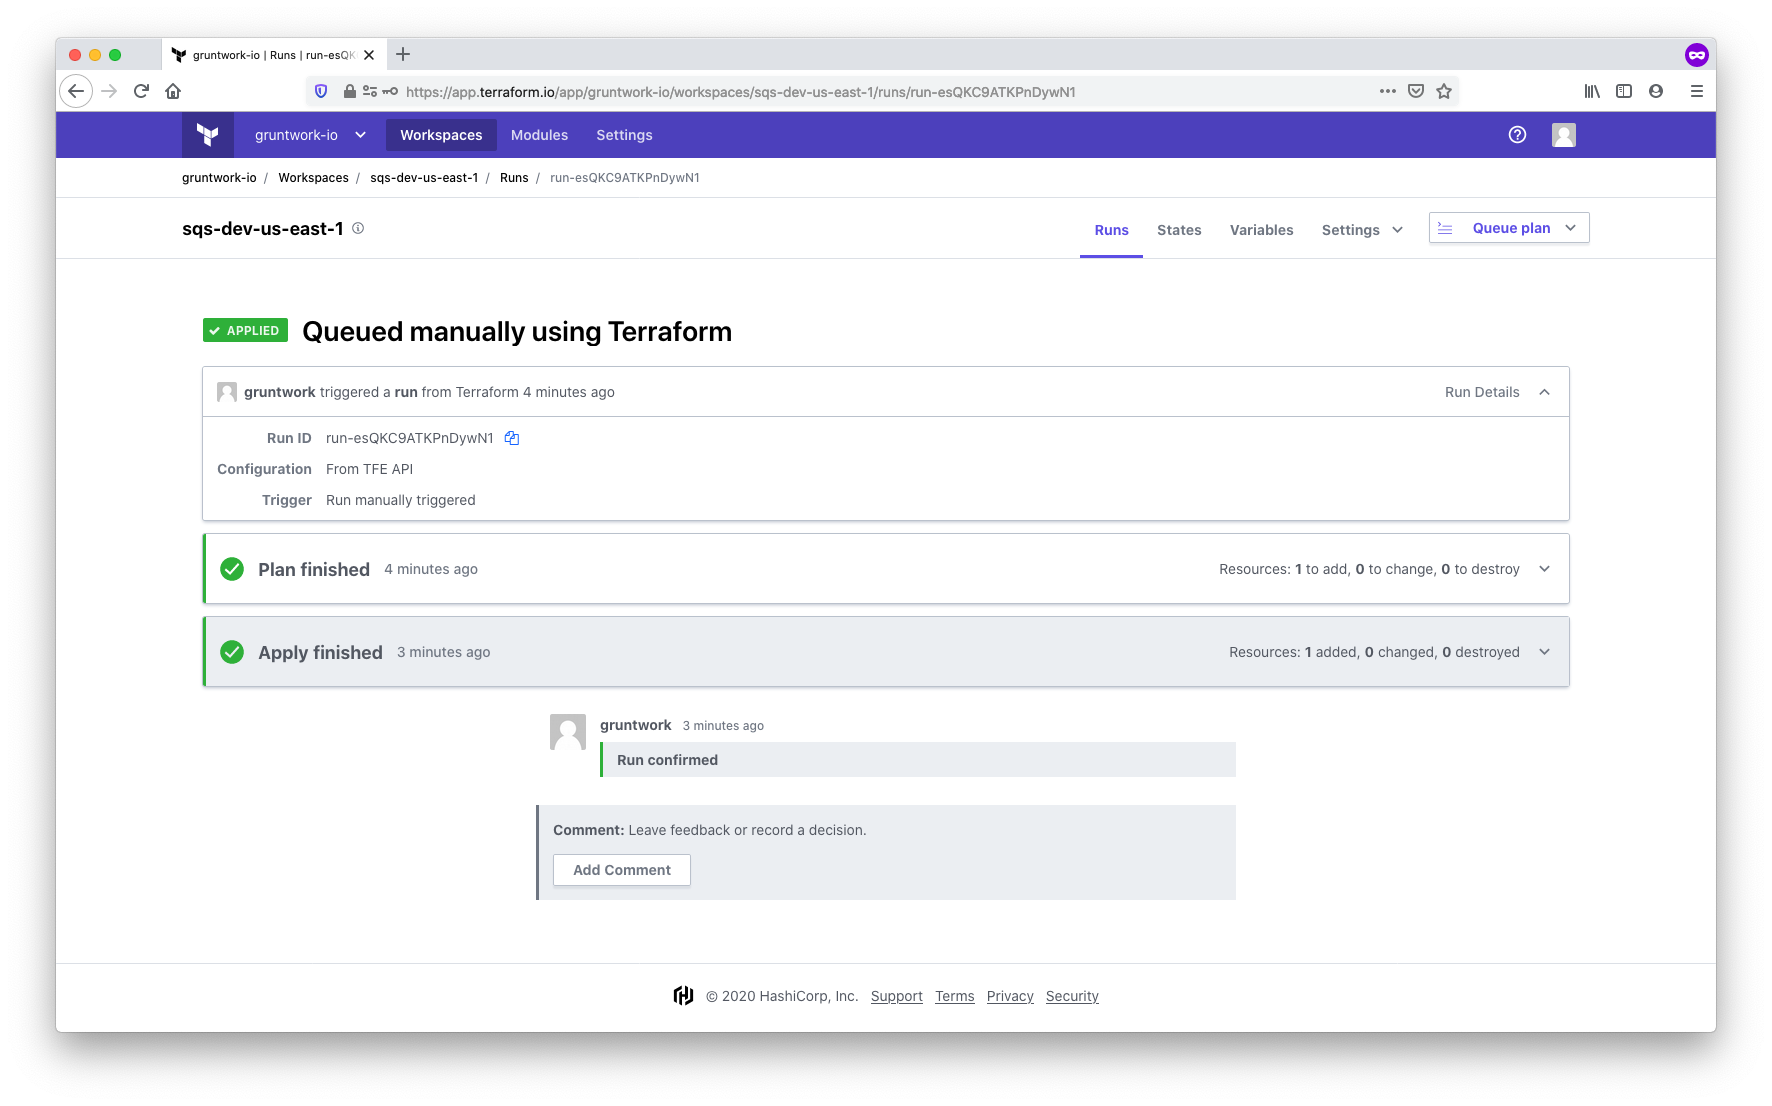 Viewing the Terragrunt command results in the TFC UI
Other commands, such as destroy, work in the same way.
Summarizing Terragrunt and TFC/TFE compatibility
By leveraging the features outlined above, you can effectively use Terragrunt with Terraform Cloud (TFC) or Terraform Enterprise (TFE) as a remote backend. Terragrunt enables dynamic generation of backend blocks and tfvars files, simplifying configuration management. Commands like terragrunt apply-all operate similarly to non-TFC/TFE workflows by processing module dependencies in sequence and enabling the smooth transfer of outputs between modules. Terragrunt takes this approach to ensure efficient and consistent infrastructure management across environments.
To make this setup work, pre-create workspaces and configure them with the necessary credentials for cloud access. Use this setup to seamlessly integrate Terragrunt with TFC/TFE, simplifying infrastructure management and preserving flexibility.