Applying Your First Patch
Prerequisites
- Familiarity with Terraform or OpenTofu
- Patcher installed either locally or as a GitHub Actions workflow in your repository
Overview
In this tutorial, we will walk through the following steps:
Using Patcher locally:
- Create a new infrastructure Unit that references a sample OpenTofu module, intentionally specifying an outdated version.
- Run
patcheragainst the module to detect outdated dependencies. Review the outputs and explore options for applying patches. - Instruct
patcherto apply the patch. - Commit the updated changes.
Using Patcher as a GitHub Actions workflow:
- Create a new infrastructure Unit that references a sample OpenTofu module, intentionally specifying an outdated version.
- Push the unit to your remote GitHub repository.
- Trigger
patcherto detect the outdated unit and apply the patch. - Review the pull request created by
patcherand merge the changes.
The patcher-test module
In this tutorial we use the patcher-test module from the gruntwork-io/terraform-aws-utilities repository. For demonstration purposes, we will specify version v0.10.3 as outdated in our infrastructure unit and update it to v0.10.4, which includes a breaking change.
Applying a patch using Patcher locally
Choose a directory named: <DIRECTORY> in your repository to add a new infrastructure unit. Create a file called terragrunt.hcl in that folder with the following content:
terraform {
  source = "git@github.com:gruntwork-io/terraform-aws-utilities.git//modules/patcher-test?ref=v0.10.3"
}

# Include the root `terragrunt.hcl` configuration, which contains settings common across all environments and components.
include "root" {
  path = find_in_parent_folders()
}
Now run patcher update. You can execute this command from the root of the repository to scan all units in sub-folders, or directly inside the <DIRECTORY> directory.
$ cd <DIRECTORY>
$ patcher update
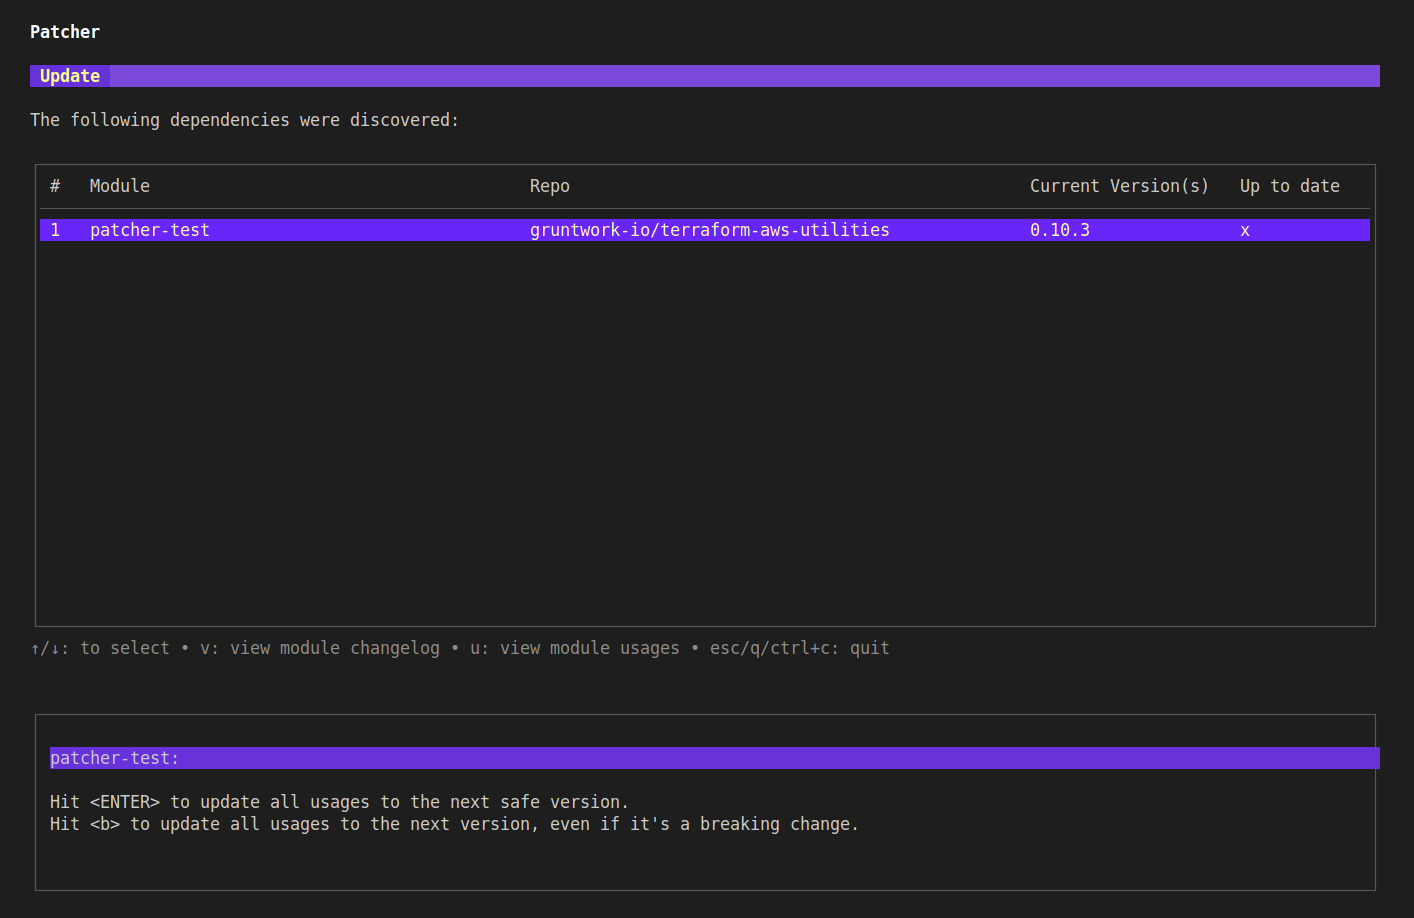 Patcher Update homepage showing an update to the patcher-test module is available
From here you can hit enter to update patcher-test, or u to view usages of the module, v to view the changelog, or q to quit.
Hitting u to view changes shows the following:
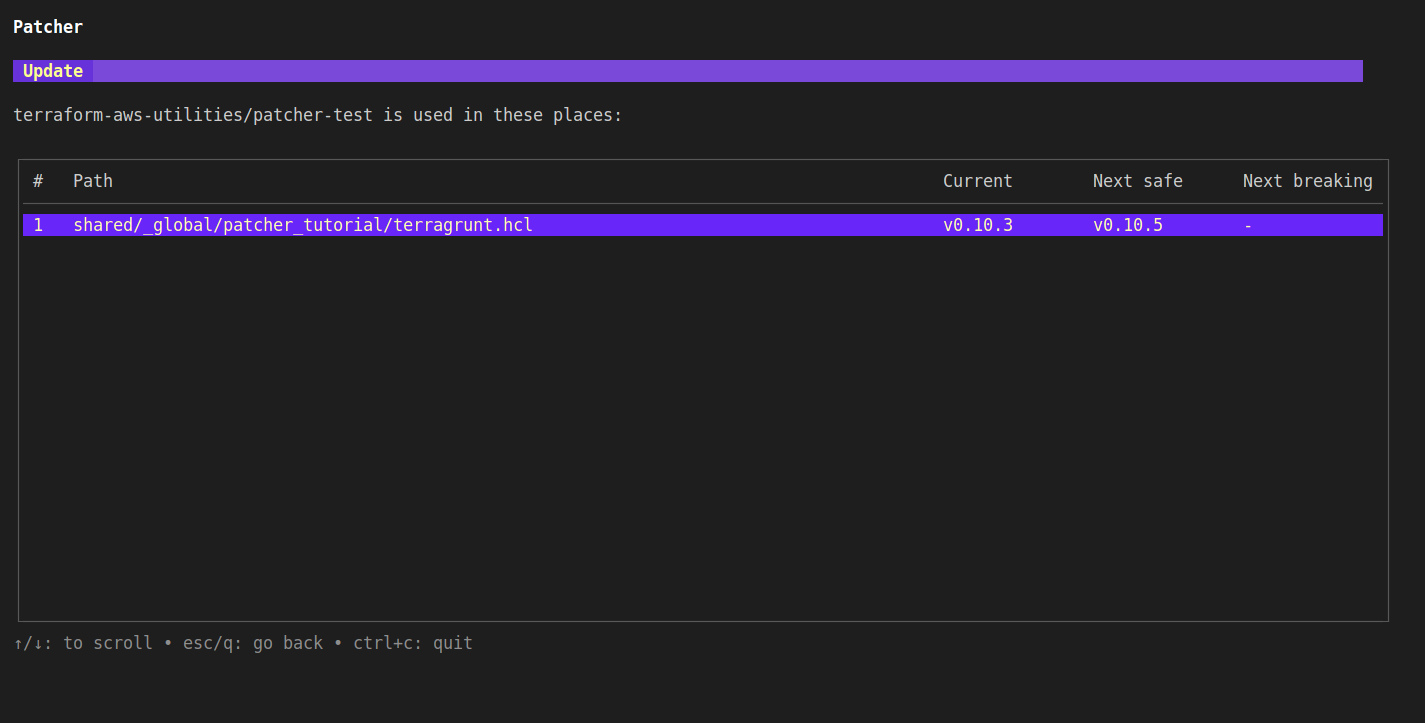 The changes page shows every unit that uses the module, and what the most recent version it
Hitting v to view the changelog shows the following:
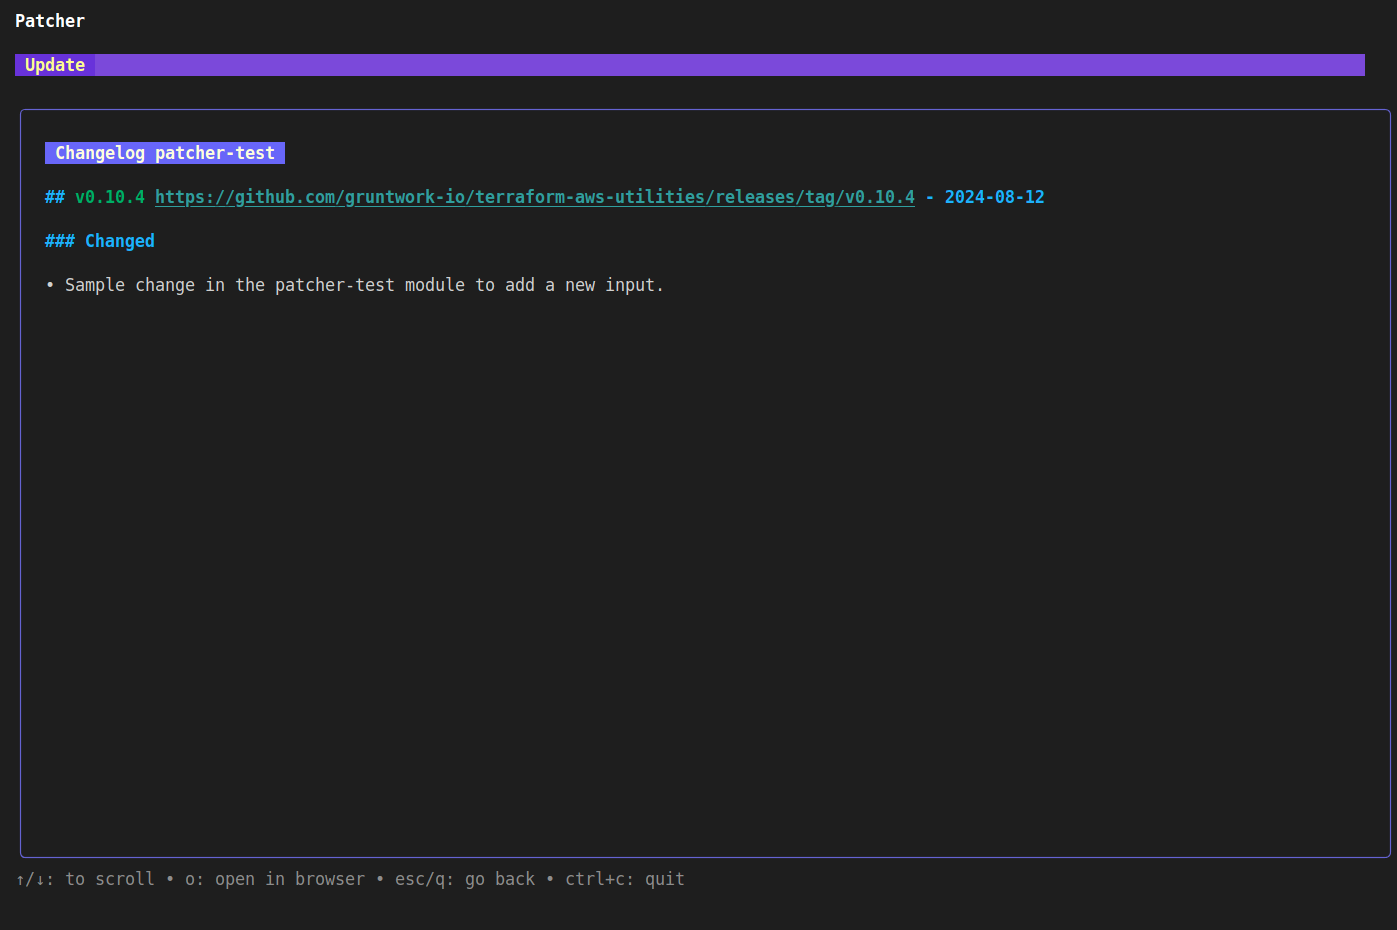 The changelog page shows the changelog directly from the upstream module
Press enter to apply the update with Patcher:
 Patcher update shows that it found a patch to be applied and what version it is incrementing to
 Patcher Update completion notice
You can now inspect the file system to verify the results of the patch. In this case, the update changed the version of patcher-test from v0.10.3 to v0.10.5 and added the required argument sampleinput to the unit. Commit and push these changes to your repository.
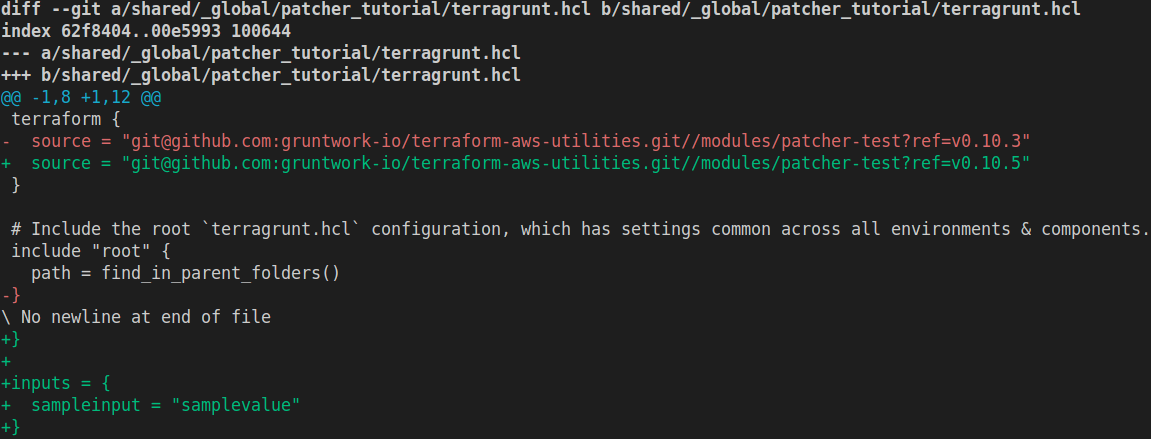 Patcher Update completion notice
Applying a patch with Patcher using GitHub Actions
Choose a directory named: <DIRECTORY> in your repository to add a new infrastructure unit. Create a file called terragrunt.hcl in that folder with the following content:
terraform {
  source = "git@github.com:gruntwork-io/terraform-aws-utilities.git//modules/patcher-test?ref=v0.10.3"
}

# Include the root `terragrunt.hcl` configuration, which has settings common across all environments & components.
include "root" {
  path = find_in_parent_folders()
}
Now we'll push this up to your repository.
$ git checkout -b patcher-test-update
$ git add <DIRECTORY>/terragrunt.hcl
$ git commit -m "Adding a new infrastructure unit that uses the patcher-test module"
$ git push -u origin patcher-test-update
Now navigate to your repository in GitHub and create a new pull request for the patcher-test-update branch. For Patcher to recognize this unit as needing an update, it must first be merged into <main>. Go ahead and merge the pull request.
In a real-world scenario, it is uncommon to create a new unit that is immediately out of date. Typically, Patcher runs on a schedule to detect module updates after they have been merged. For this tutorial, however, we are intentionally merging an outdated module into <main> to trigger Patcher to update it immediately.
Once the code has been merged into <main>, you can trigger Patcher to scan for outdated modules.
If Patcher is not already installed in your repository, you can add the following GitHub Actions workflow:
name: Patcher - Update Dependencies

on:
  pull_request_target:
    types:
      - closed
    branches:
      - <main>
  workflow_dispatch:

permissions:
  contents: write

jobs:
  update:
    runs-on: ubuntu-latest
    steps:
      - uses: actions/checkout@v4

      - uses: gruntwork-io/patcher-action@v2
        with:
          # If you're not sure what token to use here, reach out to Gruntwork support for guidance.
          github_token: ${{ secrets.GRUNTWORK_TOKEN }}
          pull_request_branch: patcher/update-dependencies
          pull_request_title: "Patcher: Update dependencies"
          spec_file: ""
Navigate to https://github.com/YOUR_ORG/YOUR_REPO/actions/workflows/patcher.yml and select Run Workflow -> Run workflow.
 Patcher GitHub Action Workflow Page
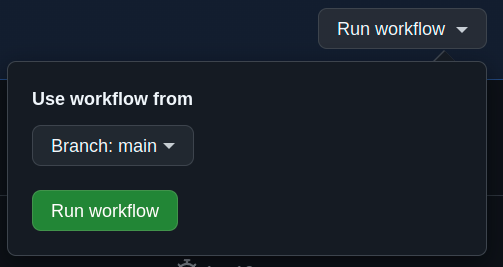 Click on "Run workflow" to manually trigger patcher
At this point, the action will begin. After a few seconds, you should see a new action run. Once it completes, a new pull request will be opened in your repository containing the updated code.
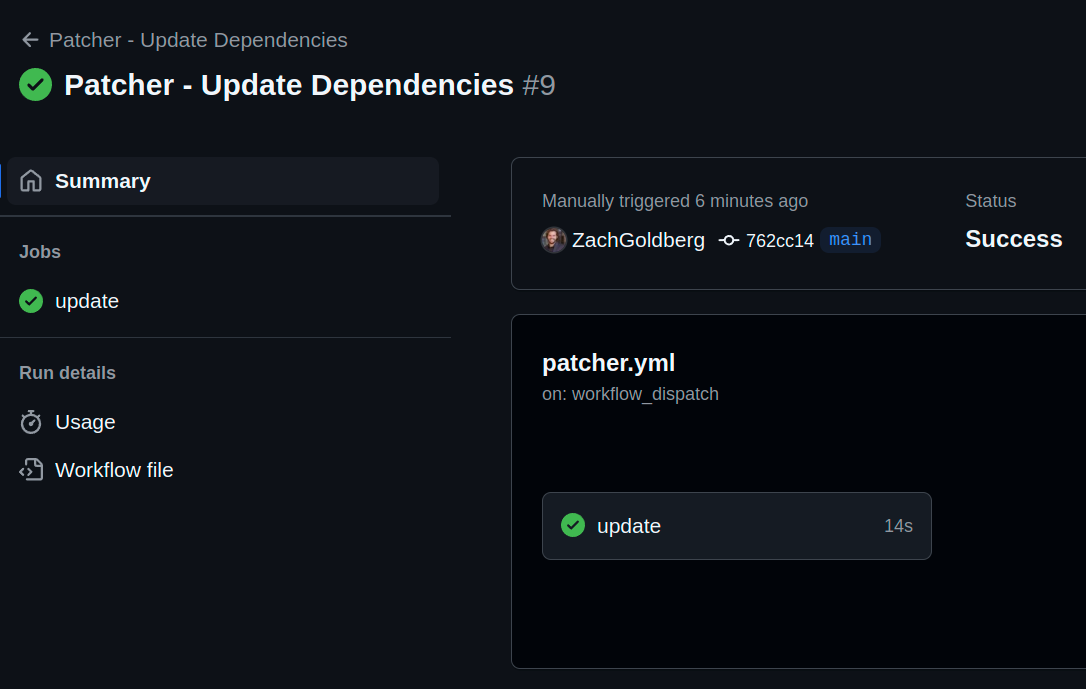 The workflow completed successfully
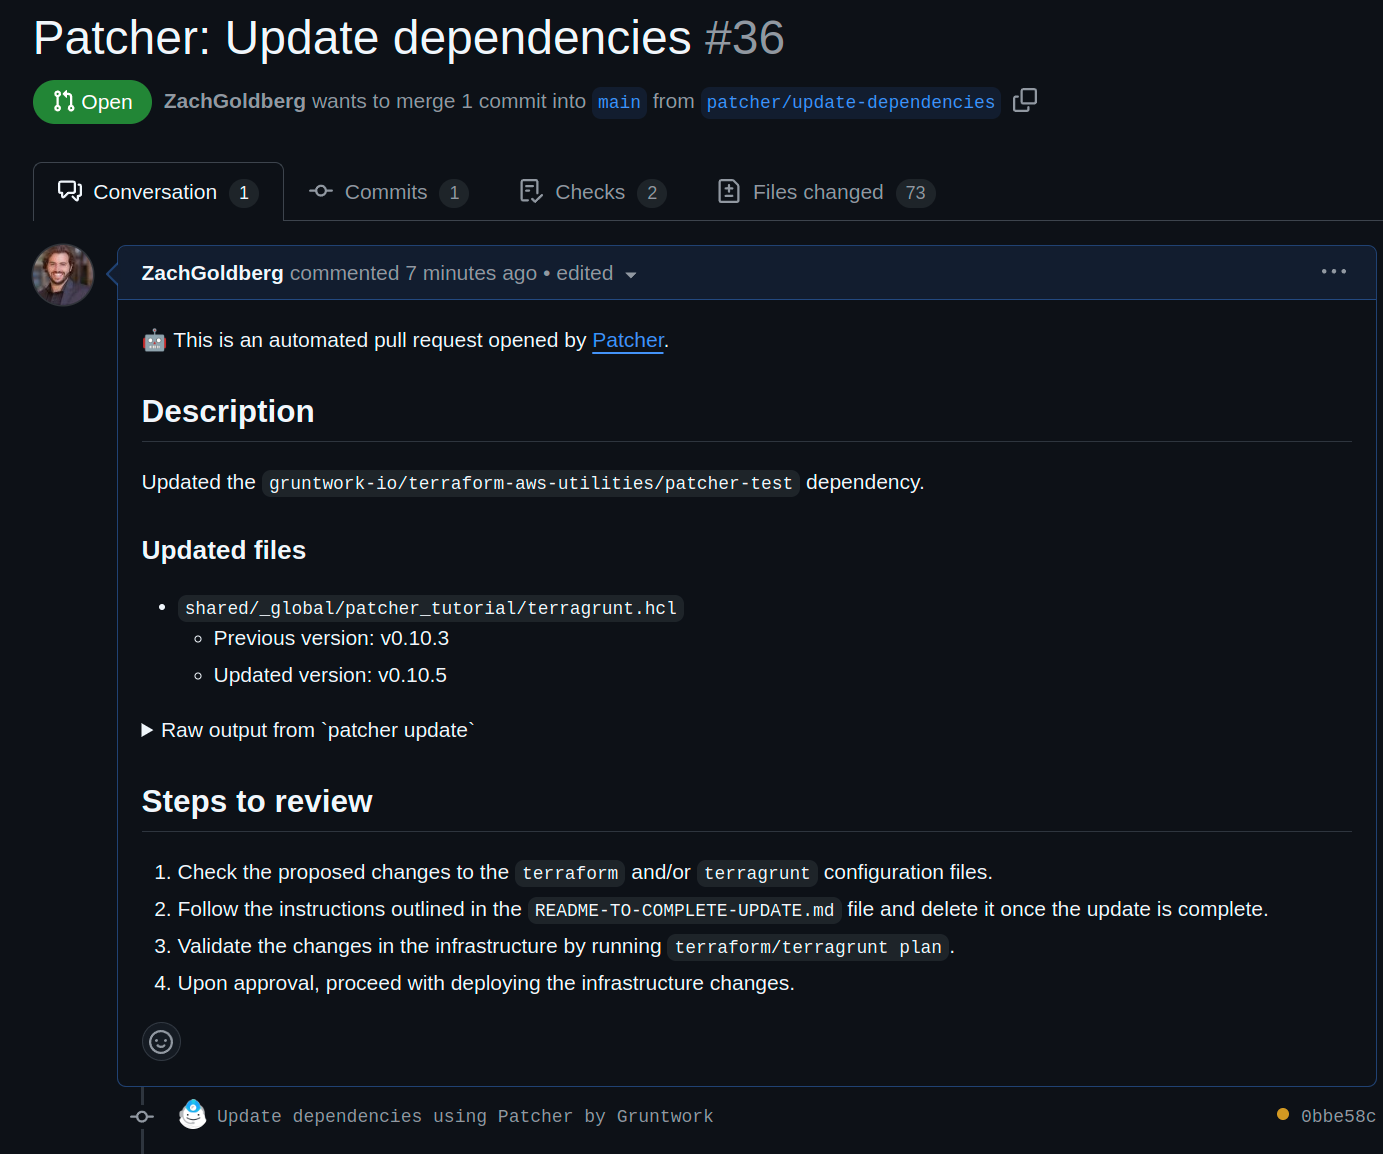 The pull request Patcher created, complete with details of what was patched.
 The content of the pull request, including version changes and code modifications as a result of applying patches
At this point, if you are a Gruntwork Pipelines customer, Pipelines will automatically plan the change and post the results as a comment. If the results look good, you can merge the pull request to apply and finalize the change.